Trusted by experts
페이지 정보
작성일2024-12-06본문
with the Balanset-1A Device
Preparing the Necessary Tools
- accelerometers, laser rpm sensor, mounting stand, software application, and additional tools.
- Set up the instrument and connect it to your computer via USB. Verify that the software is correctly installed.
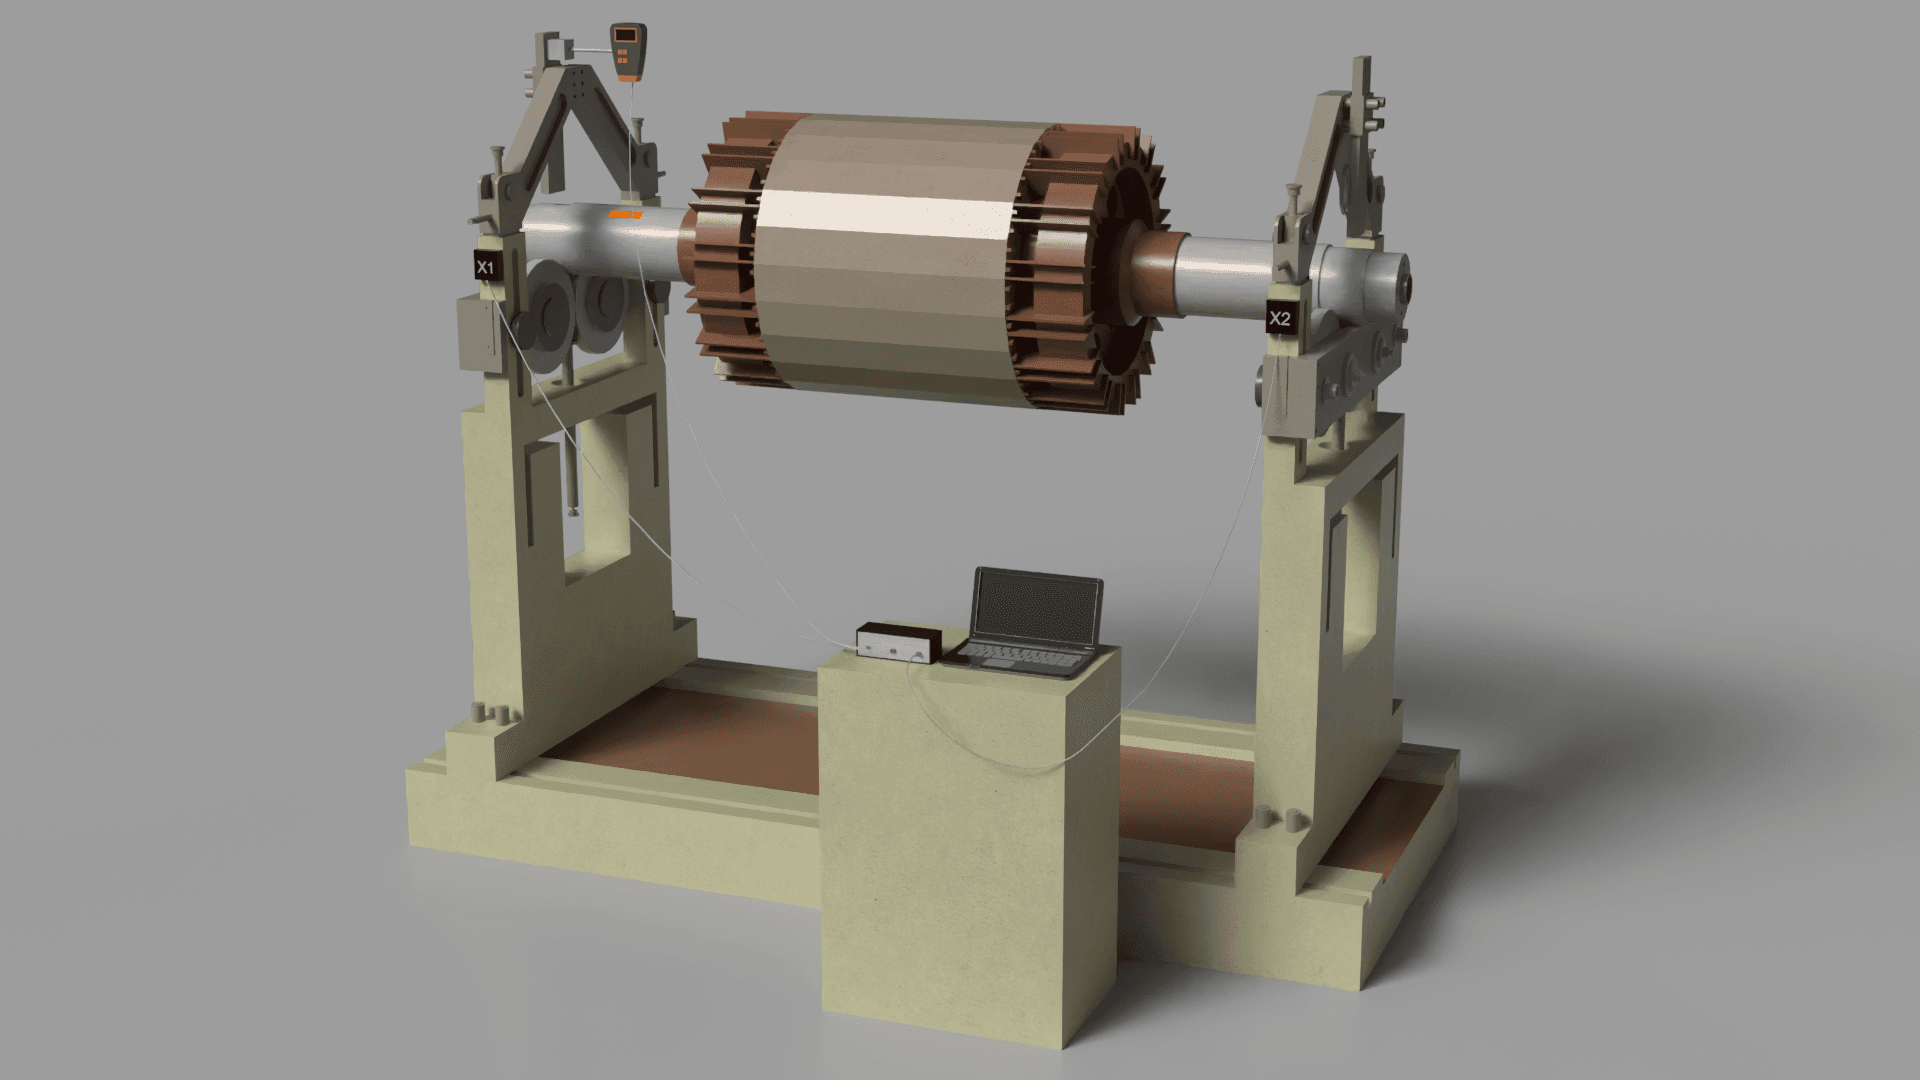
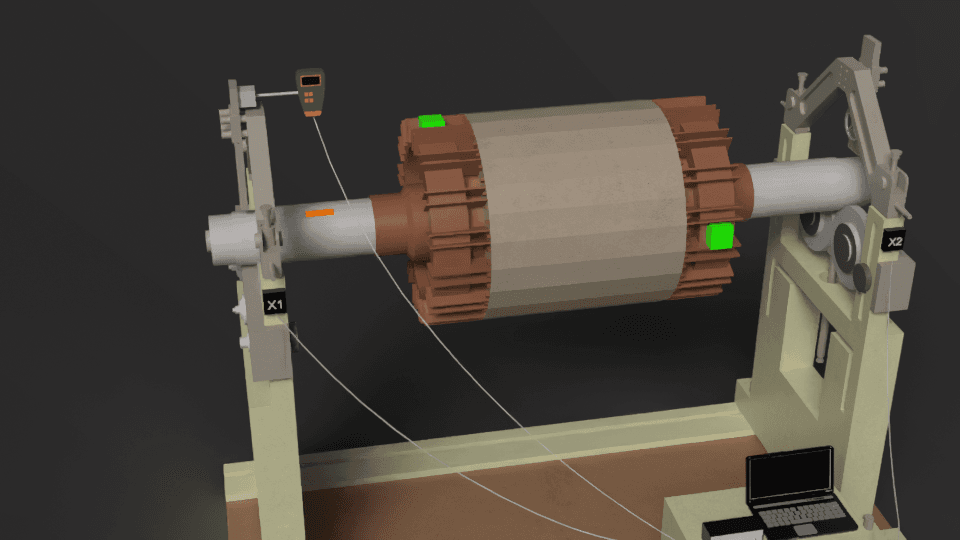
Mounting the Sensors
- Mount the vibration transducers securely on the machine's housing where vibrations are most pronounced, typically near the bearings.
- Direct the laser speed sensor towards the rotor and affix reflective tape to the rotor surface to facilitate phase angle measurement.
Launching the Software
- Open the Balanset application on your PC.
- Configure the software for either single-plane or two-plane balancing, based on the rotor's characteristics and the desired outcome.
Initial Vibration Measurement
- Run the rotor up to its operating speed.
- The program will record the vibration amplitude, rpm, and phase, providing a baseline measurement of the existing imbalance.
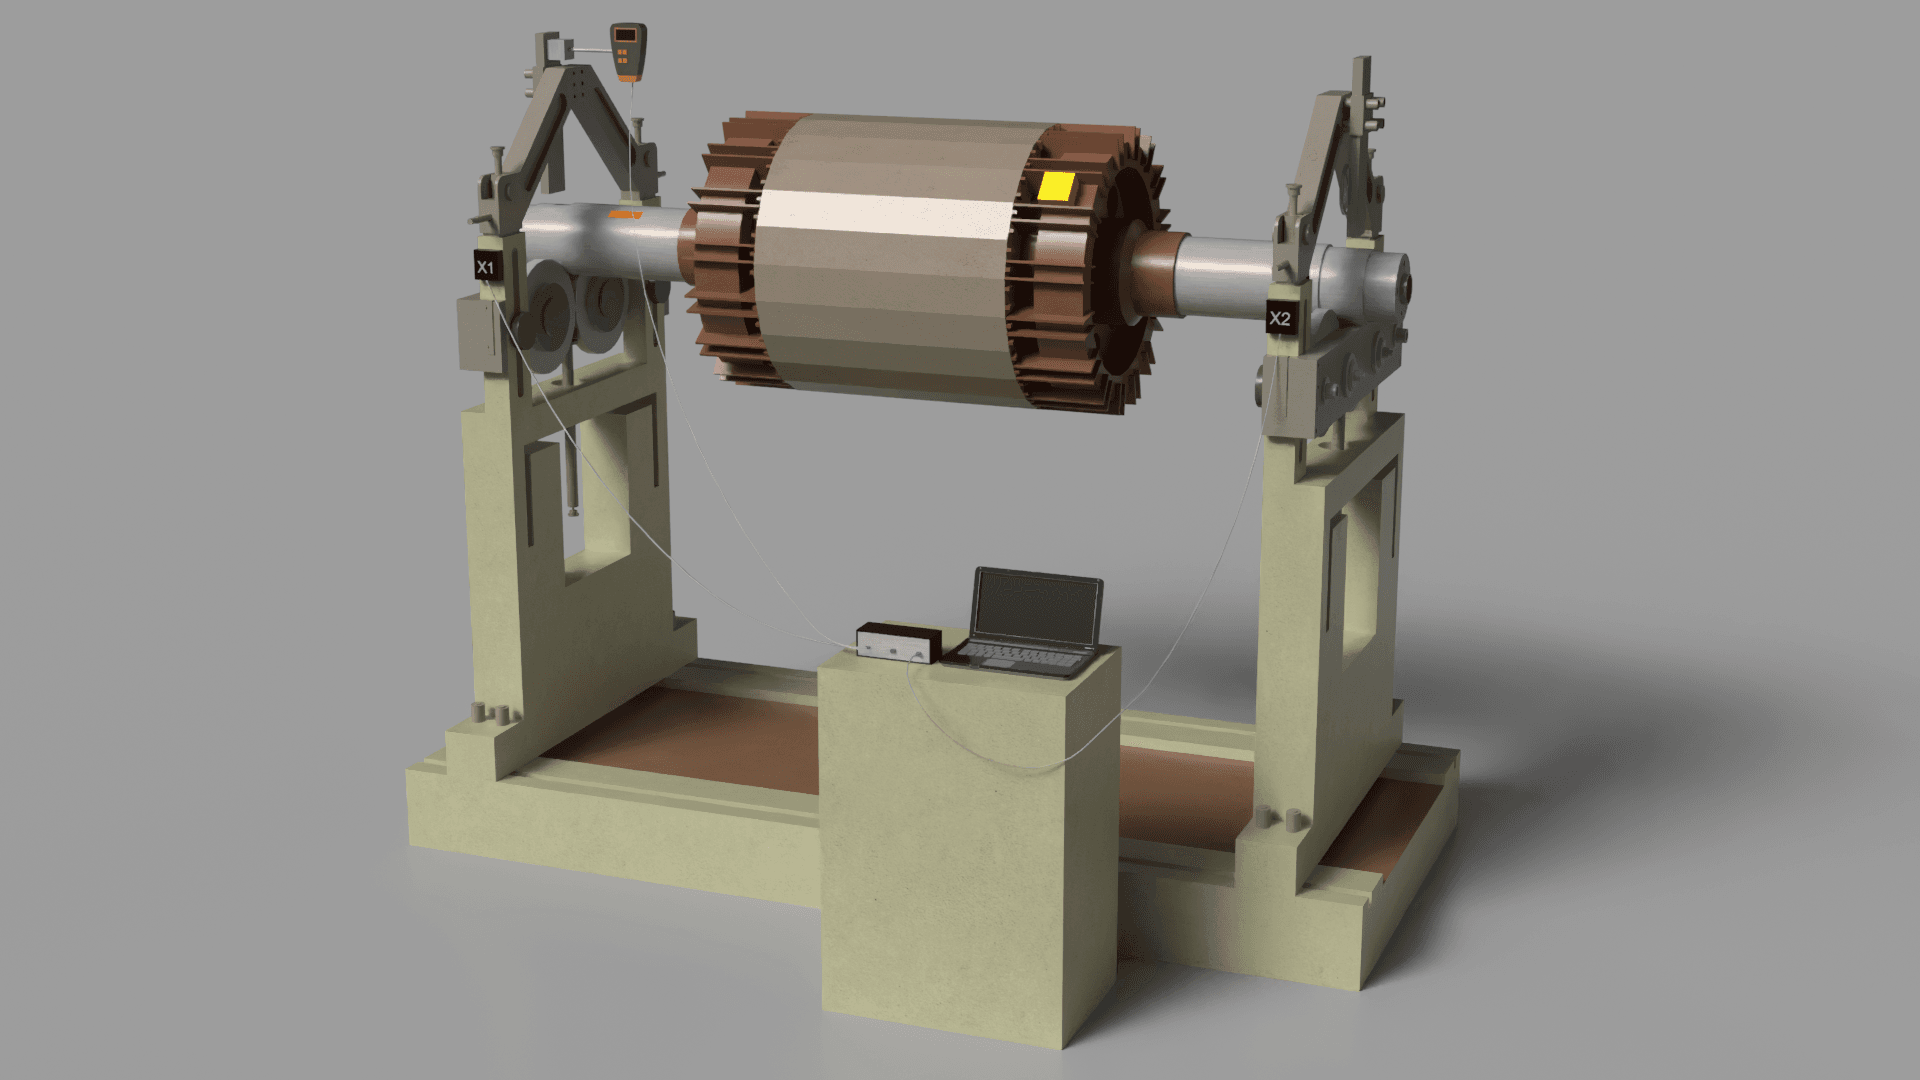
Mounting the Test Weight
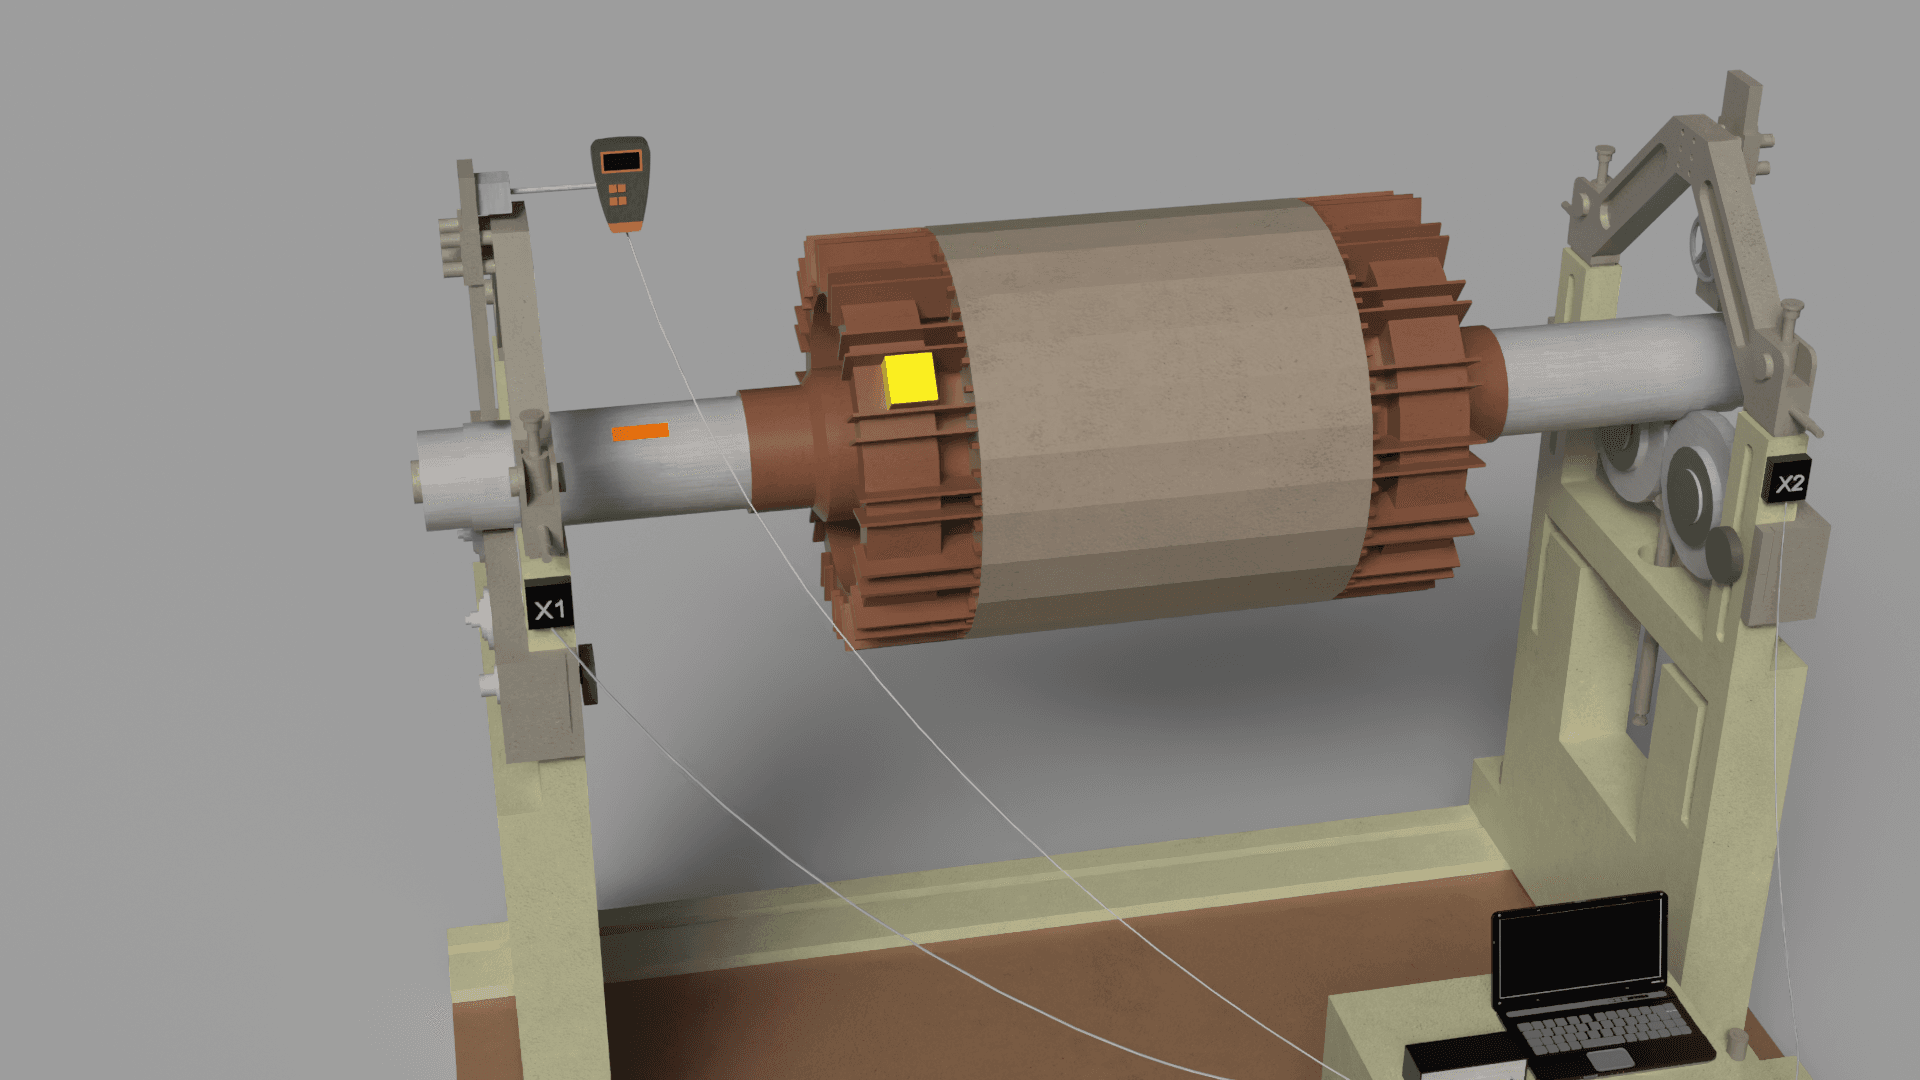
- Bring the rotor to a standstill and affix a trial weight at a predetermined point on the rotor, specifying its mass in the software (typically in grams).
- Restart the rotor, and the software will record the changes in vibration level and phase angle.
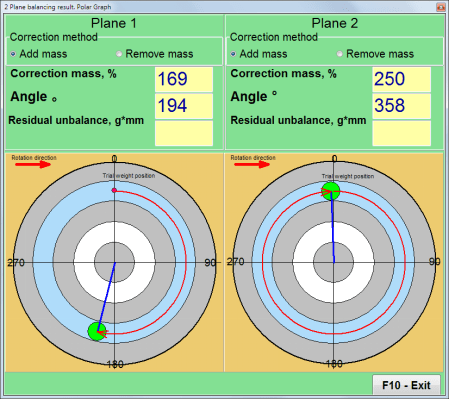
Determining the Corrective Mass
- Based on the measured data, the software automatically calculates the correction weight parameters: mass and installation angle.
- The calculated values are presented on-screen in both numerical and graphical formats.
Installing the Correction Weight
- Install the correction weight on the rotor according to the software's calculations.
- Periodic checks can be performed to ensure the balancing procedure is effectively reducing the vibration.
Verification and Balancing Completion
- After installing the correction weight, run the rotor again and check the residual vibration level.
- If the measured vibration falls within the tolerance defined by ISO 1940, the balancing process is considered successful.
- Should the vibration still be excessive, repeat the balancing steps, making further adjustments to the corrective weight as needed.
Report Generation
- The balancing results are saved in the software's archive. You can create and print a report containing vibration data, correction weight mass, and its installation angle.
Final Recommendations
- Double-check that all weights and sensors are securely fastened.
- Confirm that the rotor spins freely and quietly, without any unusual sounds or vibrations.
- If the rotor operates within a larger assembly, check the functionality and interplay of all interconnected parts.
Following this procedure enables accurate balancing, minimizes vibration, and prolongs the service life of the equipment.
Instagram: https://www.instagram.com/vibromera_ou/ Youtube : https://youtu.be/guA6XJ-ArZM?si=vmkuX7RILzKBl0zL Our website about Balancing of presses